- Smart Home
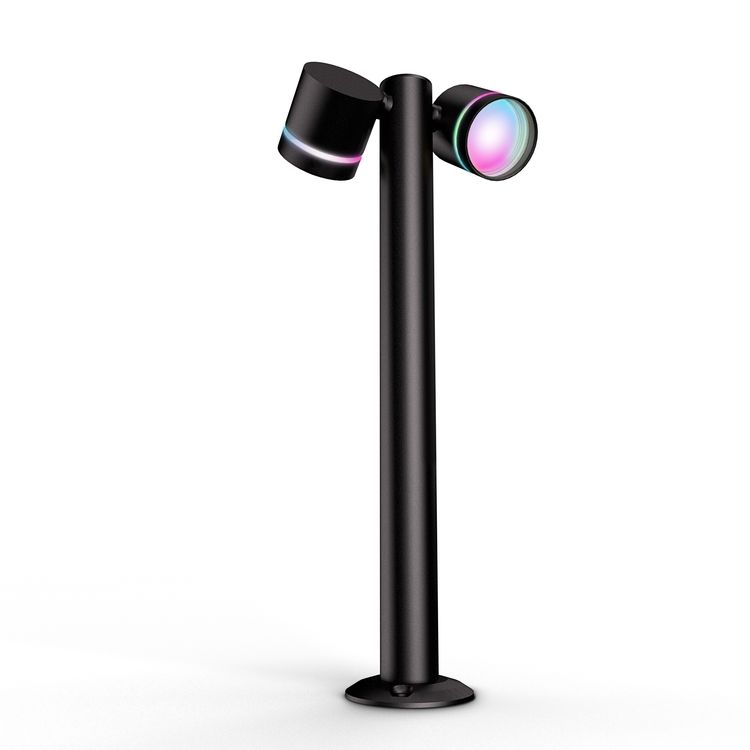
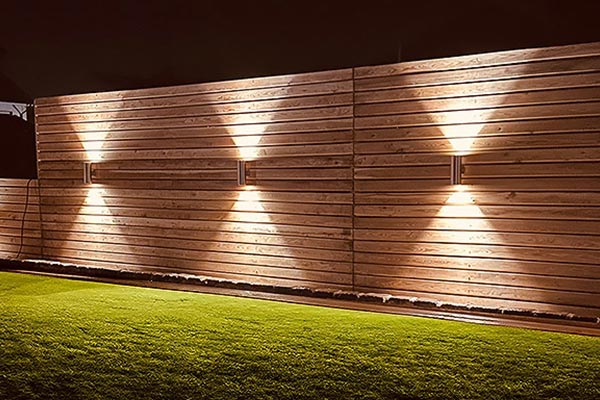
Gartenbeleuchtung mit Wow-Effekt
Service-Center
Sie benötigen Hilfe? Fragen Sie uns:
Lichtbringer
Bärbel
Wir sind für Sie da:
Mo.–Fr. 09:00–16:00 Uhr
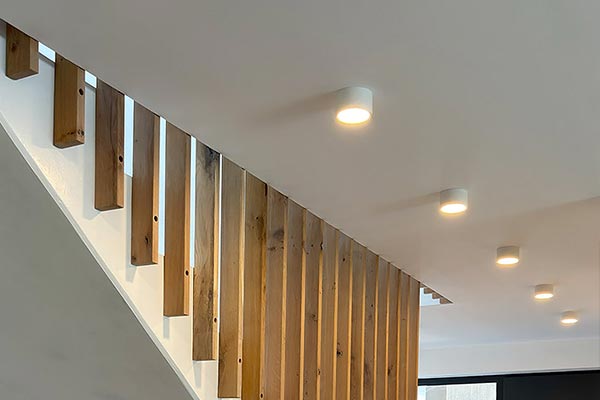
- Innenbeleuchtung Weitere Kategorien in InnenbeleuchtungDeckenspot mit Milchglas Leuchtrand
Die Deckenleuchte VORA sorgt in Ihrem Zuhause für eine angenehme Atmosphäre ohne zu Blenden. Durch den modernen Look und die matt schwarze Farbe fügt sich die Leuchte harmonisch in die Umgebung ein. Der Aufputzspot ist auch in Weiß und als Smart Home Variante erhältlich.
Jetzt entdecken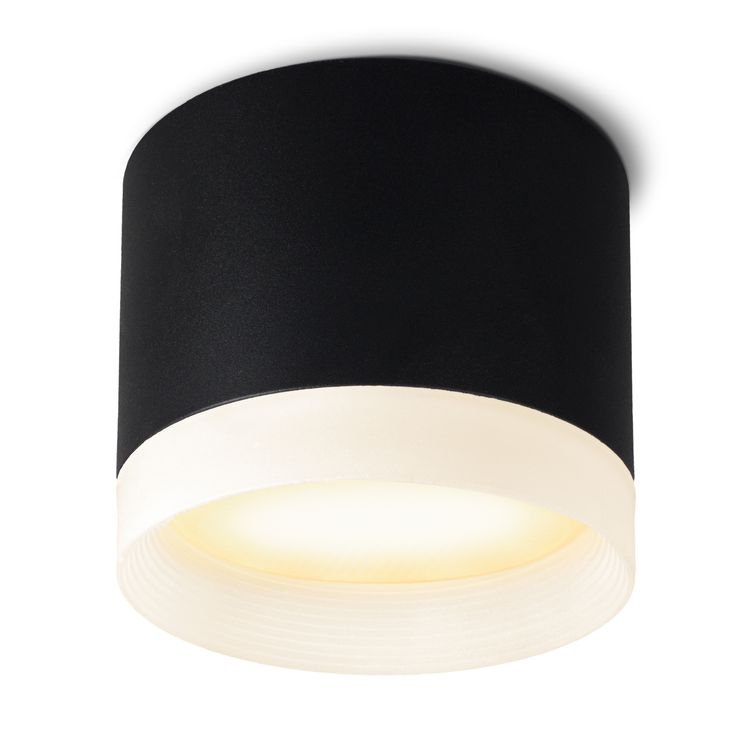
- Außenbeleuchtung Weitere Kategorien in AußenbeleuchtungWir erklären die IP Schutzarten
Welche IP Schutzart benötigt man im Badezimmer? Wie hoch sollte die Zahl bei Outdoor Leuchten sein? Was gibt es noch zu beachten?
Jetzt lesen
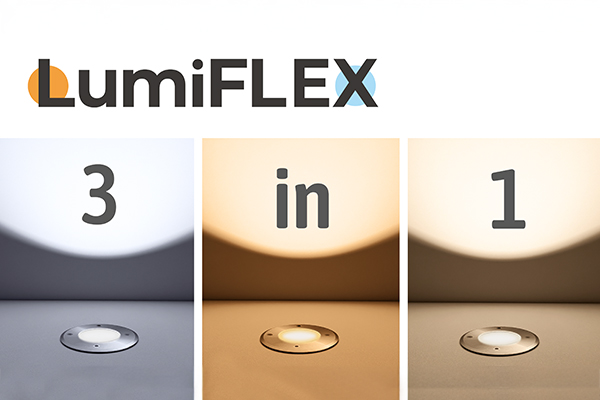
- Leuchtmittel GU10 Led Fassung LumiFLEX mit drei einstellbaren Lichtfarben
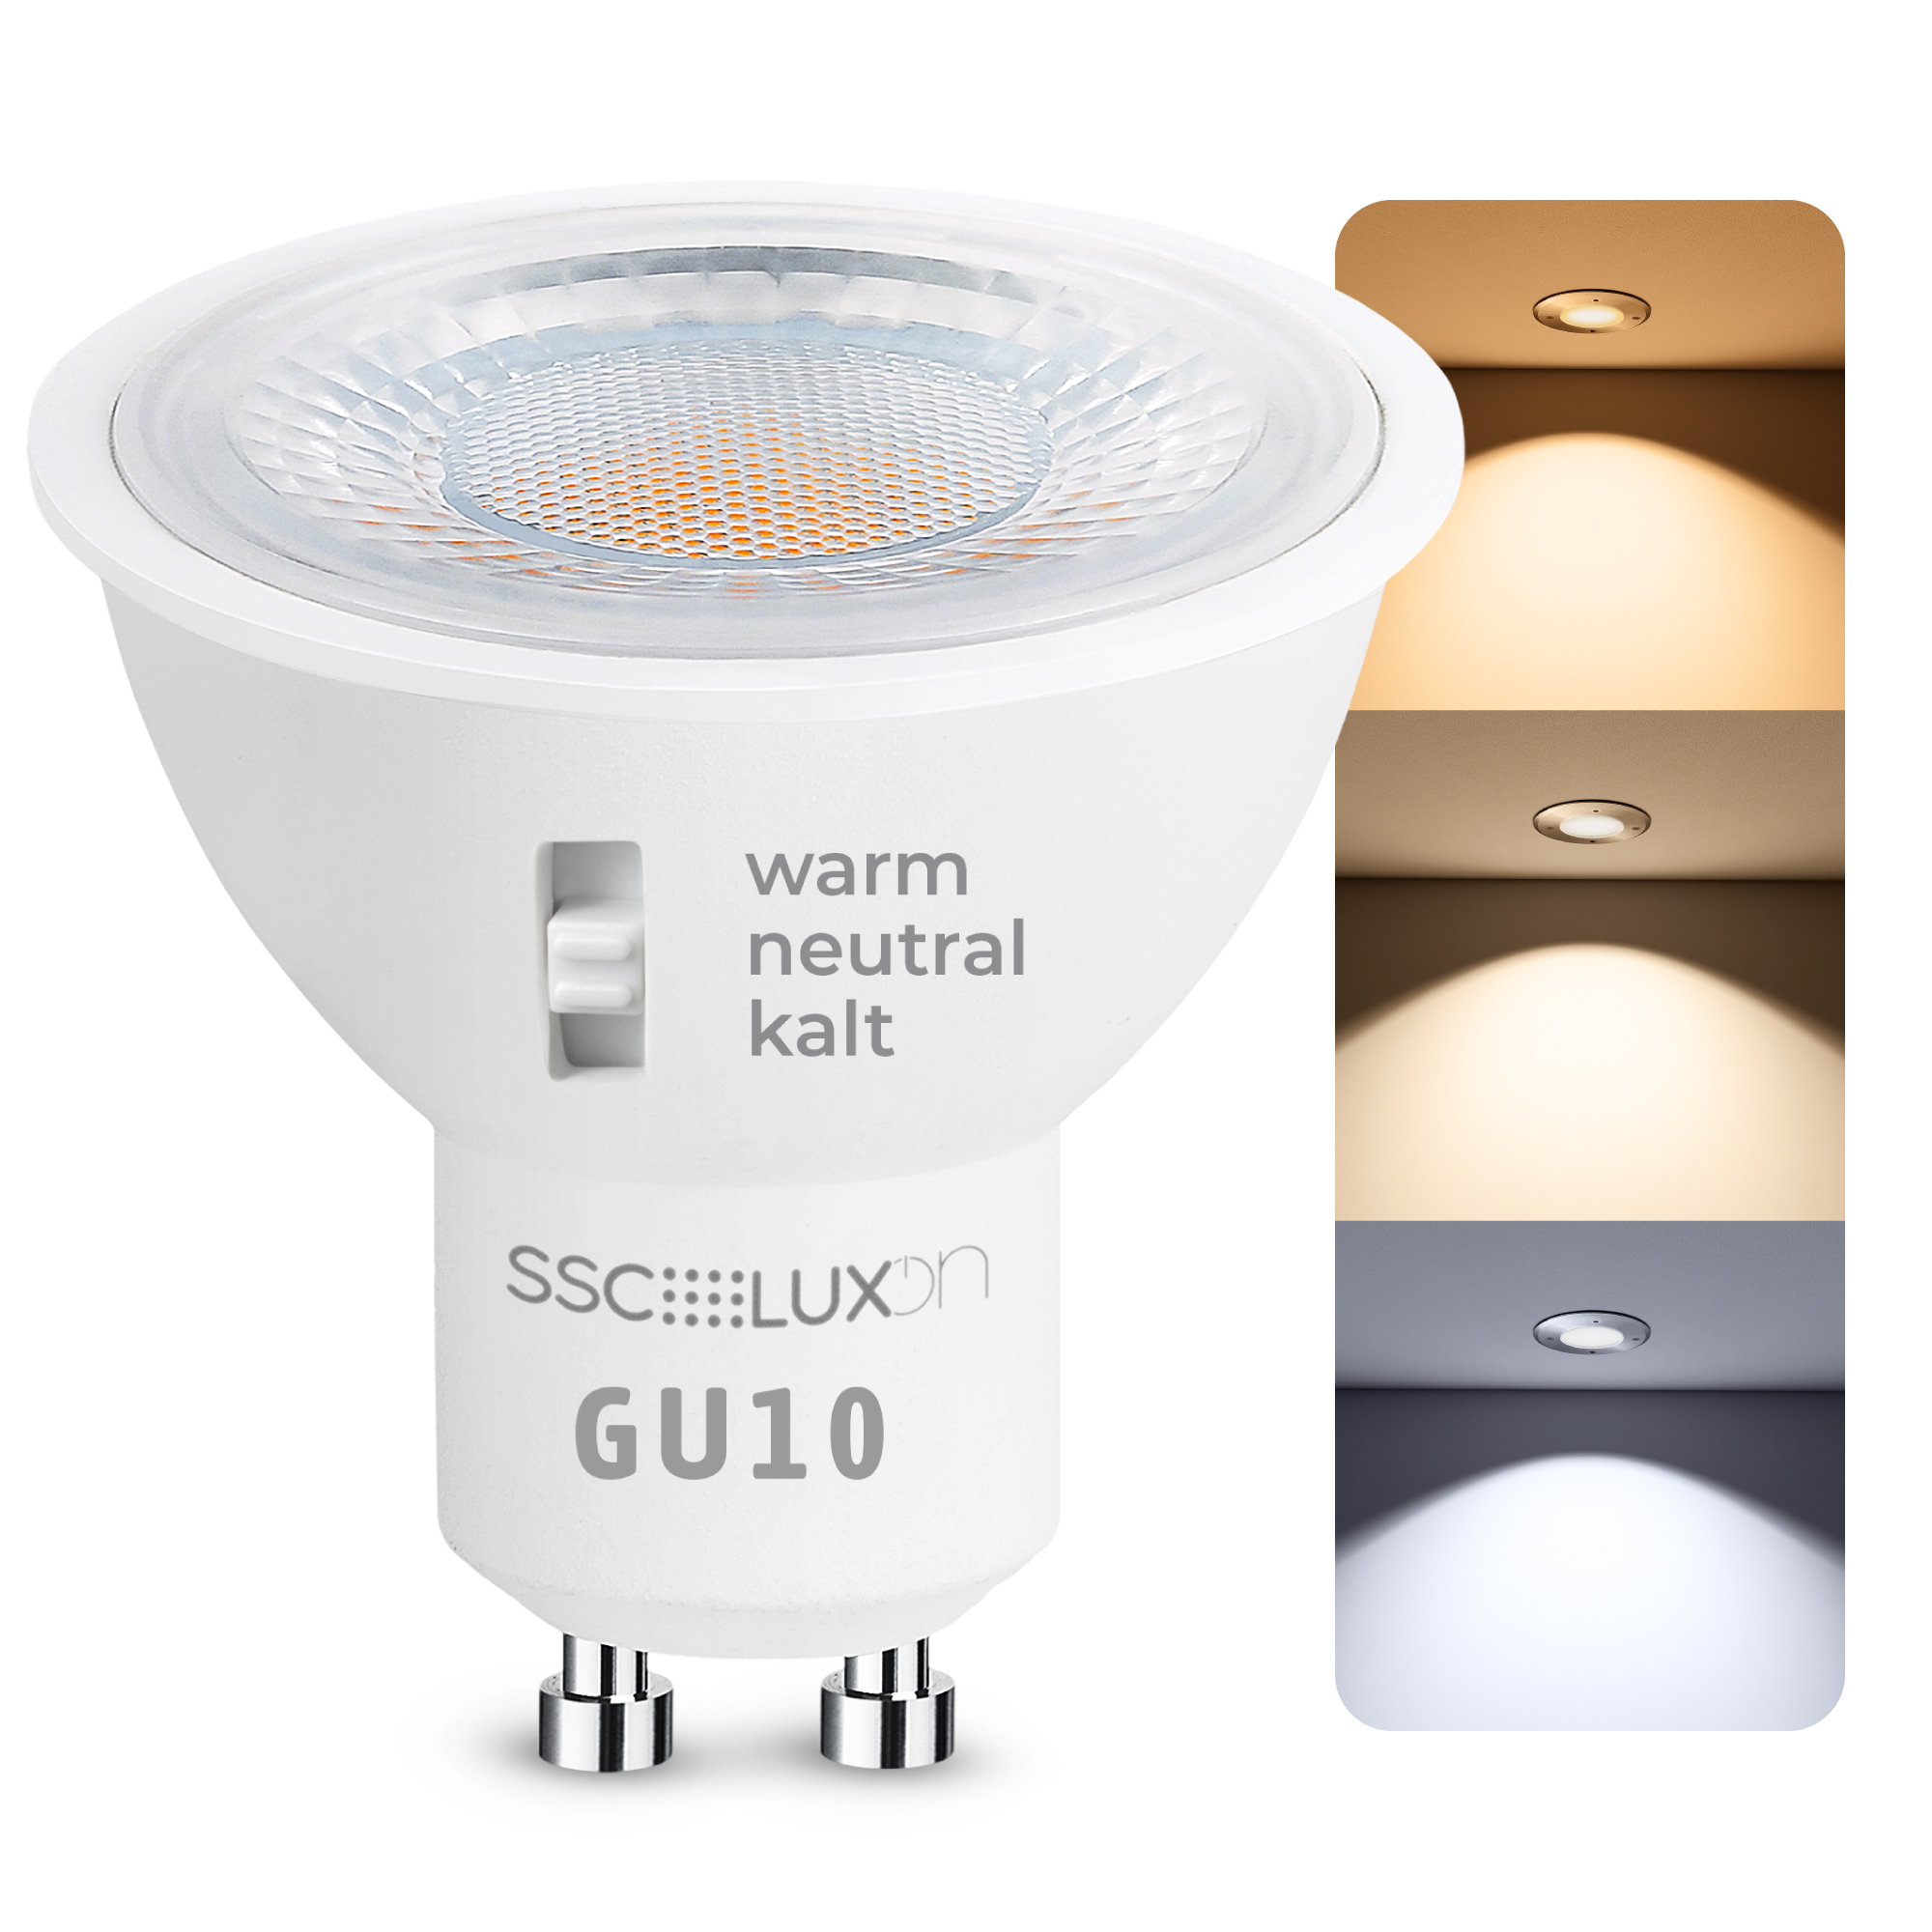
Die LumiFLEX GU10 LED bietet drei Lichtfarben für jede Situation: Warmweiß für Gemütlichkeit, Neutralweiß für klare Sicht und Tageslichtweiß für volle Konzentration – ideal für jeden Raum.
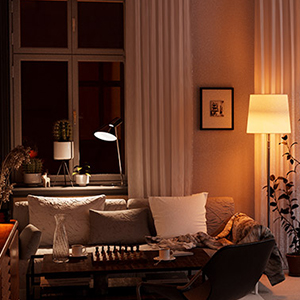
Mehr erfahrenAlles Wichtige zum Thema LichtfarbenDie Farbe des Lichtes beeinflusst maßgeblich die Raumwirkung.
Warmweiß, neutralweiß oder tageslichtweiß? Wir helfen Ihnen bei der Wahl der passenden Lichtfarbe für Ihren Anwendungszweck. Jetzt informieren
- Zubehör Wichtige Grundlagen für das Dimmen von LED Beleuchtung
 Gedimmtes Licht erzeugt Stimmung und spart Strom. Beim Dimmen von LEDs gibt es jedoch einiges zu beachten. Erfahren Sie, welche Dimmertypen es gibt, welche LED-Lampen zum Dimmen geeignet sind und welche Probleme beim Dimmen von LEDs auftreten können.
LED dimmen verstehenService-Center
Sie benötigen Hilfe? Fragen Sie uns:
Lichtbringer
Andreas
Wir sind für Sie da:
Mo.–Fr. 09:00–16:00 Uhr
- SERVICE
Service-Center
Sie benötigen Hilfe? Fragen Sie uns:
Lichtbringer
Andreas
Wir sind für Sie da:
Mo.–Fr. 09:00–16:00 Uhr


 Sie haben Fragen? Rufen Sie uns an: 07633 - 988 3000 | Mo. – Fr. 09:00 – 16:00 Uhr
 - Inspiration
Neueste Beiträge aus unserem LED-Blog
Aktuelle Kundenprojekte


1.1 Download the Smart Life App
Visit the Google Play Store or App Store with your smartphone. The Smart Life App is available for Android & iOS:

Download for Android

Download for iOS
1.2 Register with Smart Life
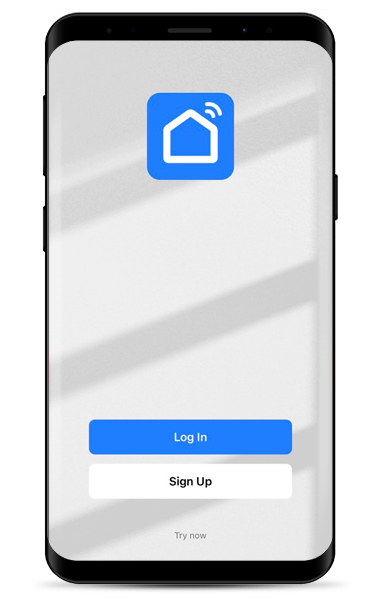
After installing the Smart Life App: Click on "Sign Up" at the beginning.
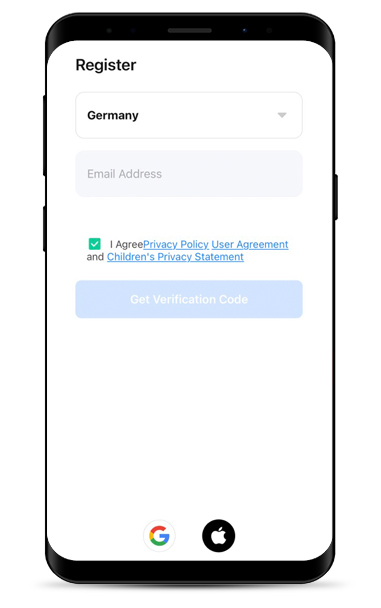
Now enter your e-mail address and confirm it with "Get Verification Code". This step is for your own security.
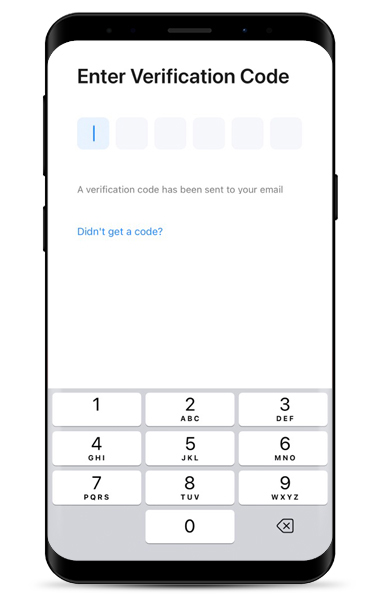
Now wait until you receive your code by e-mail and enter it in the app.
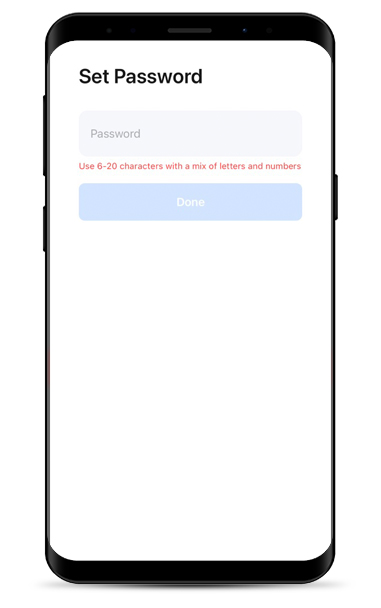
Now choose your personal password. Please note that the password should be as secure as possible (upper & lower case letters, numbers and special characters).
1.3 Add light sources & lamps in the app
Important notice:
When installing several lights, we recommend that you couple only 3 lights at a time.
Otherwise, the commissioning may not work smoothly.
However, a total of more than 3 lights can be installed per circuit.
Only the setup up should be done one after the other (3 lights each).
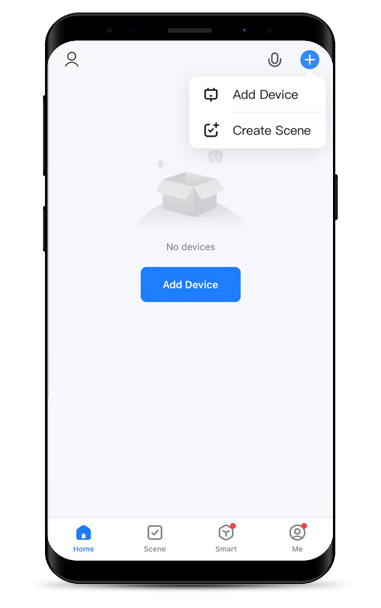
After registration, you will see the following screen - click on the plus symbol at the top right and choose "Add Device".
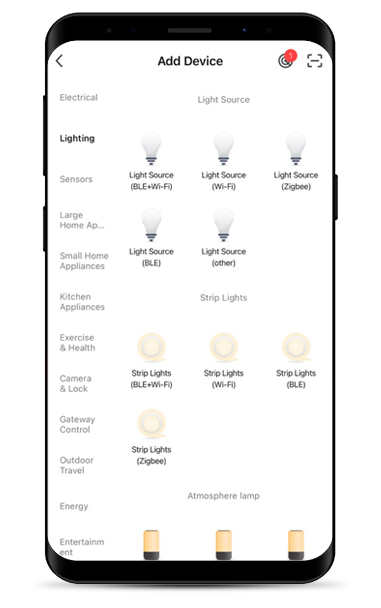
Now select "Lighting" in the left-hand menu and then "Light Source (Wi-Fi)".
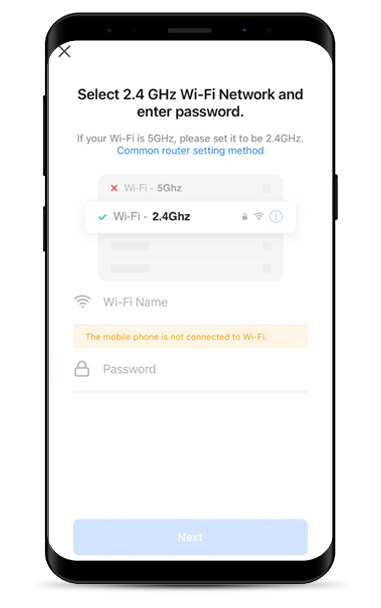
Select your Wi-Fi Network and enter the corresponding Wi-Fi password. Make sure that your Wi-Fi is set to 2.4 GHz!
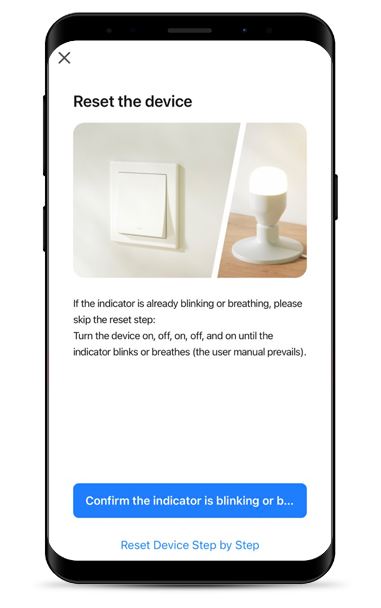
First switch on the purchased light with the smart light source. If the light flashes directly (your light at home, not in the app), select "Confirm the indicator is blinking" Otherwise, select "Reset Device Step bye Step" and follow the described steps. The light should start flashing after a short time. If not, repeat the step.
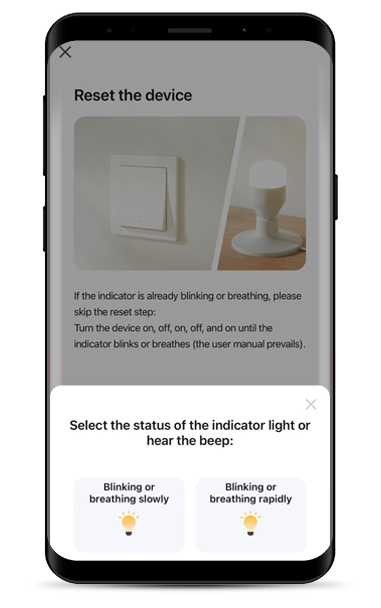
After confirming, that the light ist blinking, select the status of the light.

Wait until the light is found and added.
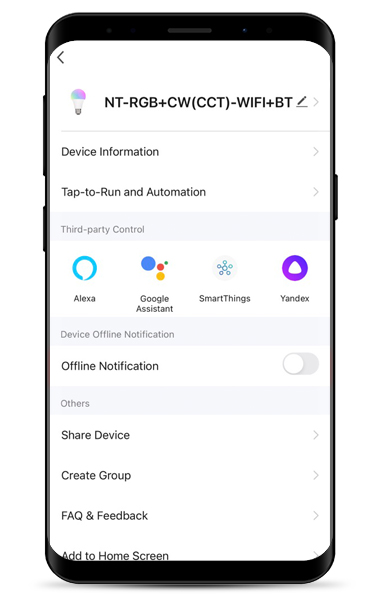
Once your light has been found, we recommend giving it a meaningful name (from [model name] to e.g. Smart Light GU10). Click on the pencil in the upper right corner to change the name.
Congratulations – you have set up your first light. For further lights, repeat the steps starting from step 1.3.
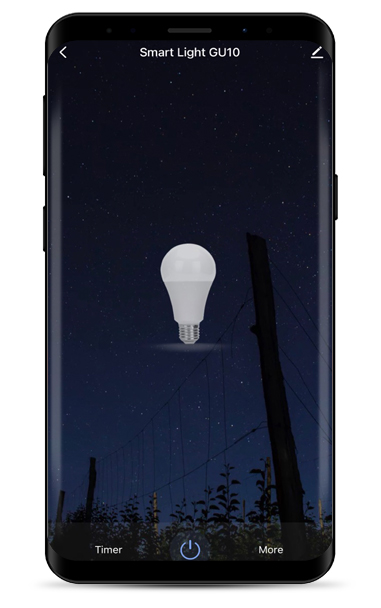
1.4 Control lights with the Smart Life app
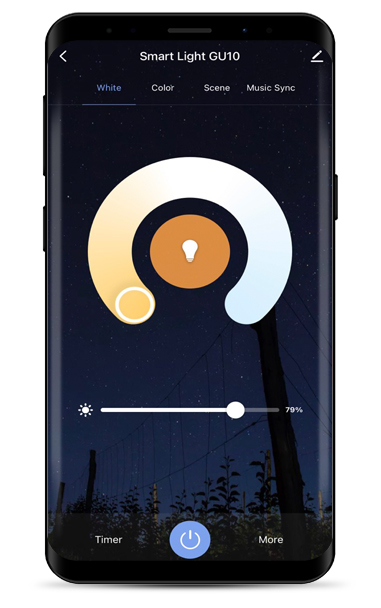
After you have clicked on your light or group (will be explained later), you can use the rotary controls to adjust the colour temperature or dim the light.
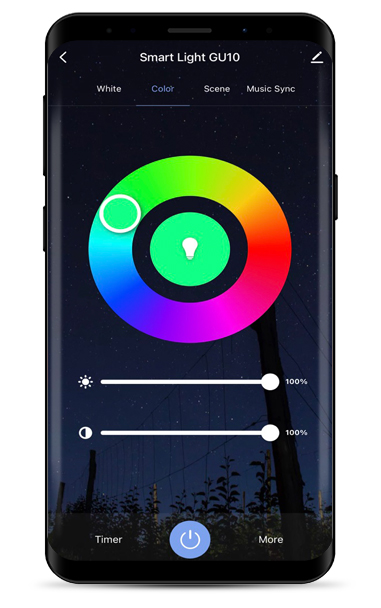
Click on "Colour" at the top of the menu to set the colour of the light. In addition, you can also dim or adjust the colour intensity here.

Scenes are ready-made programmes that automatically change the light or the light colour, for example – just try it out!
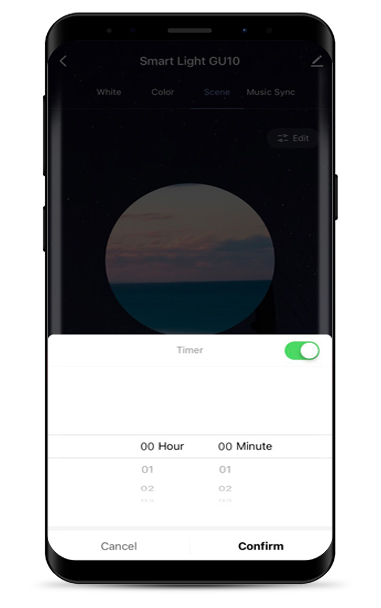
At the bottom left you will find the timer. Here you can set when the light switches on or off automatically, just like on a TV.
1.5 Create light groups
If you want to assign several lights to a group (e.g. dining room or living room), carry out the following steps:
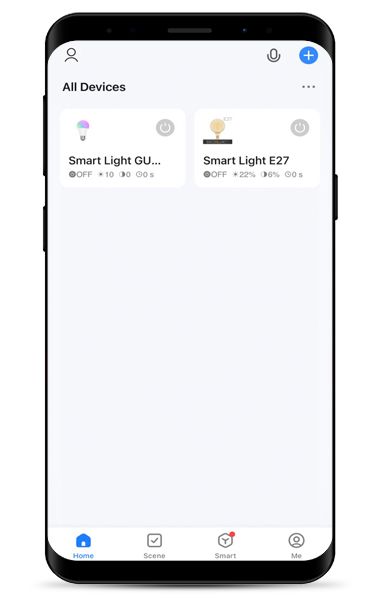
Go to the overview, where you can see all devices and click on the name of one of the lights you want to add to a group.

Click on the pencil at the top right.
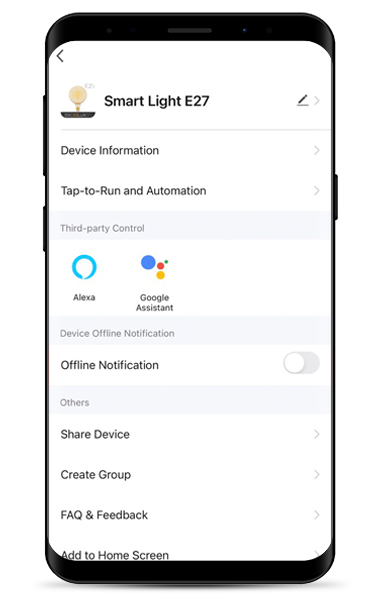
Choose "Create group".

Now select all the lights you want to assign to the group and click save at the top.
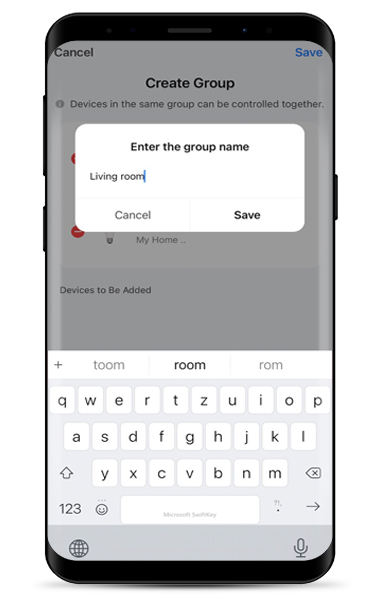
You will now be asked to give the group a name (e.g. Living room).

Done – now you can control all lights within a group in the same way as individual lights (described in step 1.4).
2.1 Connection with Amazon Echo
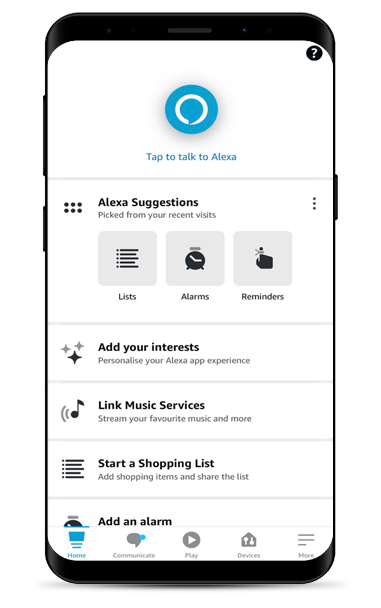
After setting up the Smart Life App, start your Amazon Alexa App. Click on "More" in the menu.
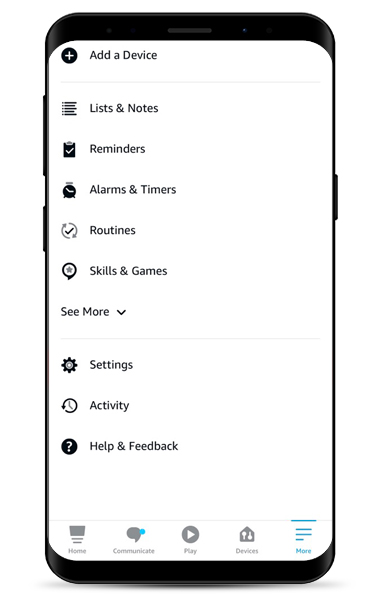
Select "Skills & Games" on the left side.
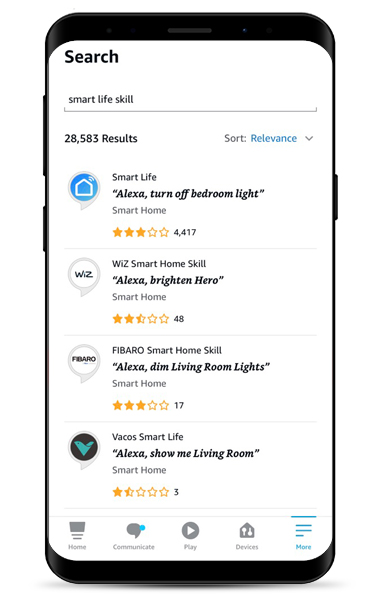
Use the search function to find the "Smart Life" skill. Then click on it.
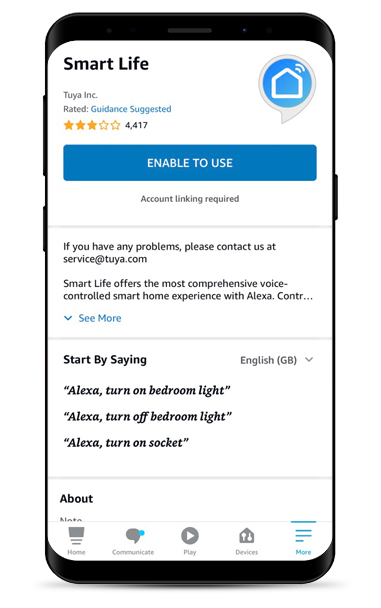
Press the "Enable To Use" button to activate the skill.
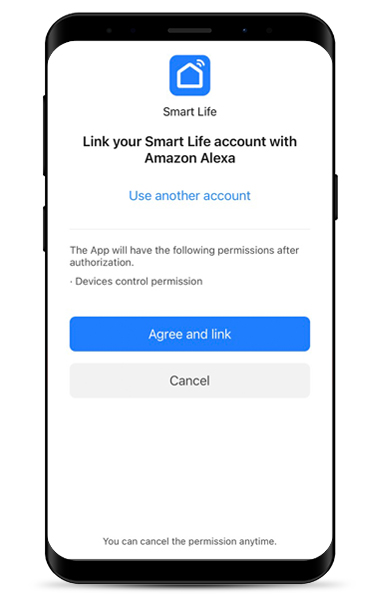
In the last step, you must agree the connection by clicking "Agree and link".
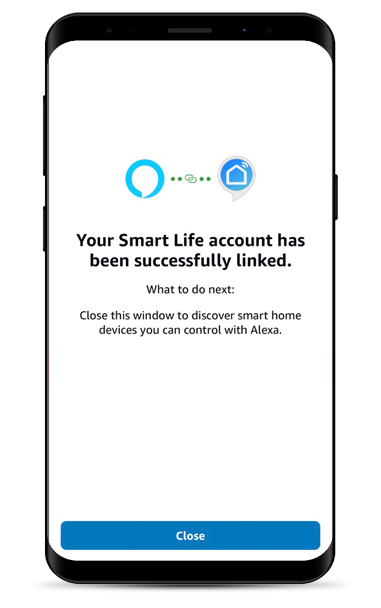
The Amazon Echo Smart Life Skill has been linked successfully. In the next step, add your lights.
2.2 Add lights to Amazon Echo
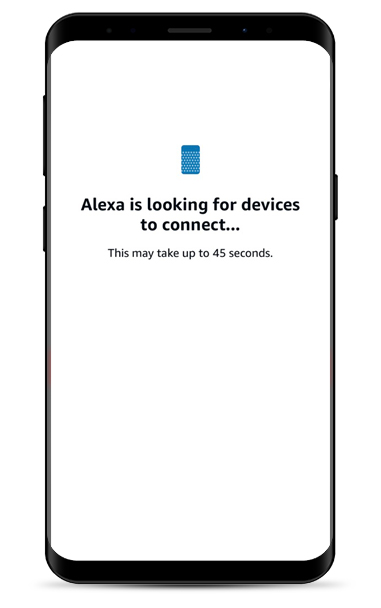
Now add the lights you have set up in the Smart Life App to your Echo. To do this, press "Detect Devices". Searching for new devices can take up to 45 seconds. Wait and do not switch off the smartphone.
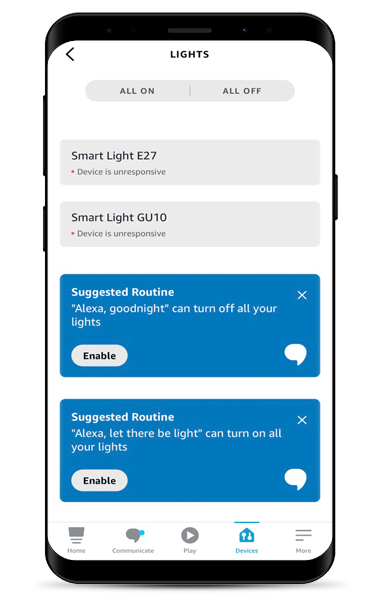
You will then see the lights in the overview. These have the same names that you previously assigned in the Smart Life App.
2.3 Create groups in Amazon Echo
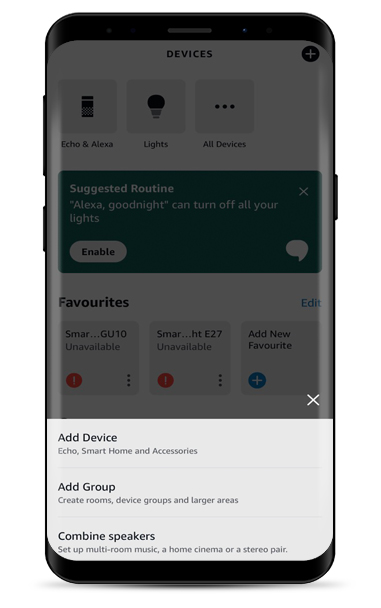
New group: Click on "Devices" in the main menu, then on the plus at the top right and select "Add Group".
Existing group: Click on the group and select "Edit" at the top right. Here you can select the light sources.
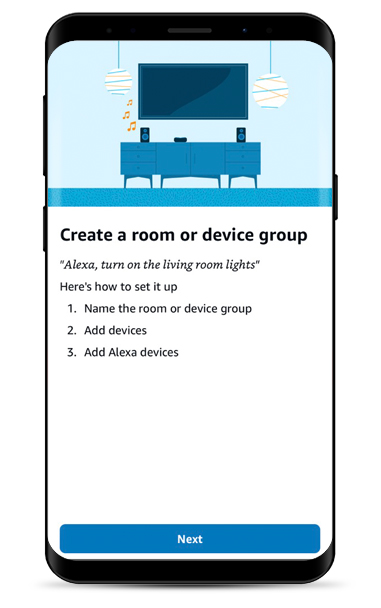
You will see an overview, how to set up a group. Click "Next".

Give the group a name, e.g. Living room.

Select the lights to be grouped.
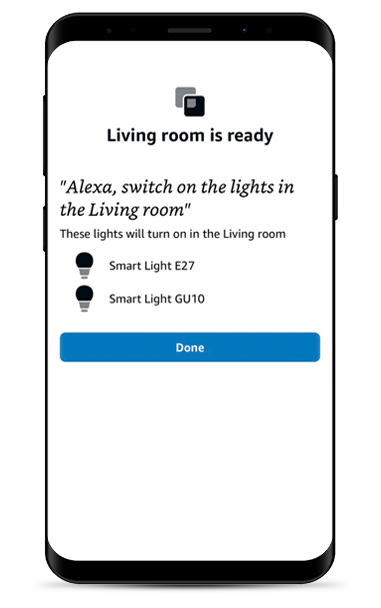
The group is ready.
3.1 Connection with Google Home
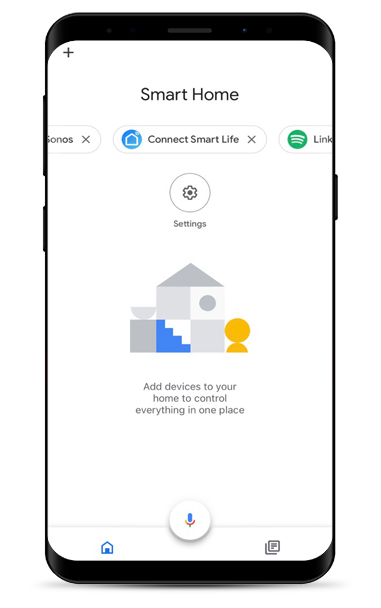
After setting up the Smart Life App, start your Google Home App. Search the button "Connect Smart Life" in the upper horizontal menu and click on it.

Agree the connection by clicking "Agree and link".

Choose the devices, you want to connect.
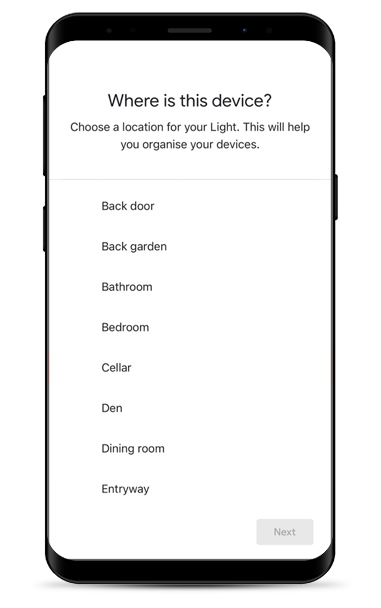
Now select a room that you want to assign to the light. In our example, "living room".
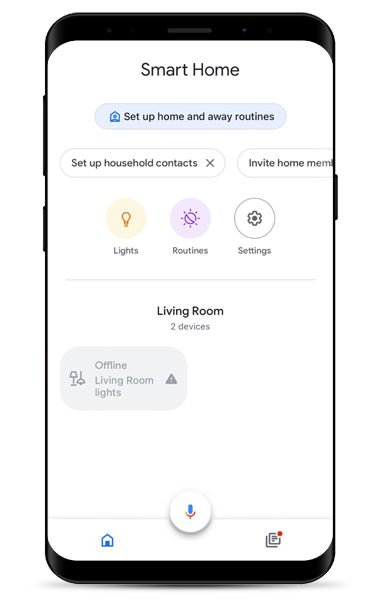
The added devices are now visible in the home screen of the Google Home app.
3.2 Control lights with Google Home
You can now control the light via the app (voice commands follow below). Click on the light or room to enter the control center.

Here, the rotary control can be used to dim the brightness, switch the light on/off and adjust the light colour.
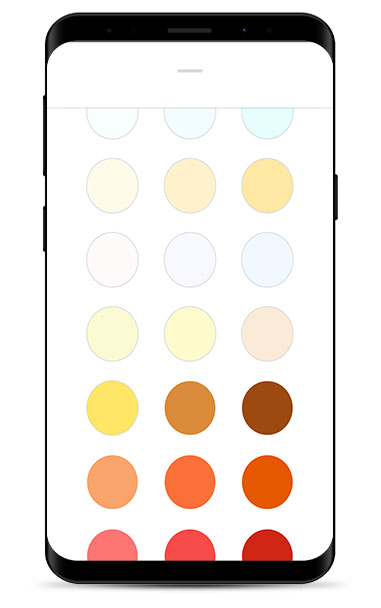
After clicking on the "Colour" button, you can choose from one of the numerous colour modes.
3.3 Manage lights in rooms & groups with Google Home
Click on settings on the home screen to edit a group.

Choose the item "Rooms and groups".
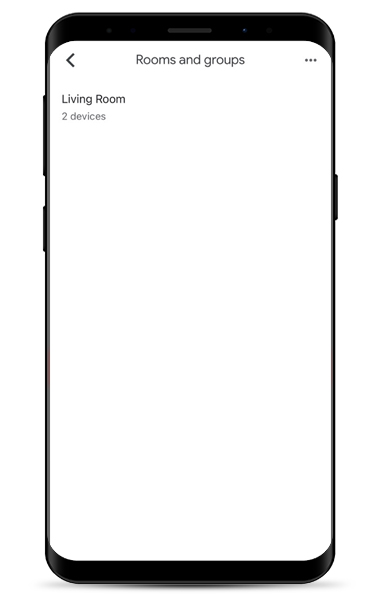
Select the room you want to manage.
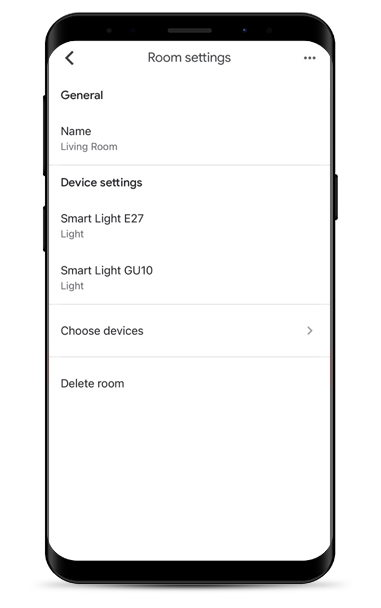
Here you can change the name of the room, add devices or delete the room.
4.1 Create a scene
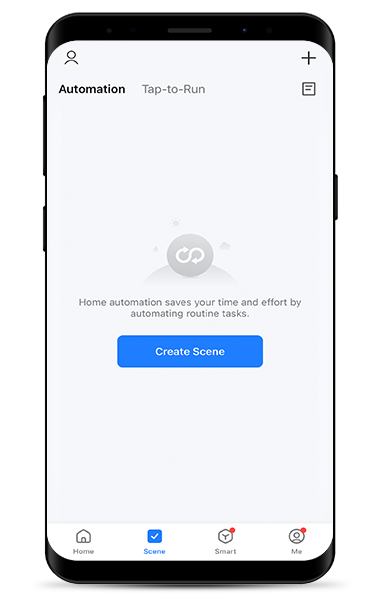
To be able to control a smart light with Siri, a scene must first be created in the Smart Life app. To do this, click on "Scene" in the lower menu bar and then on "Create scene".
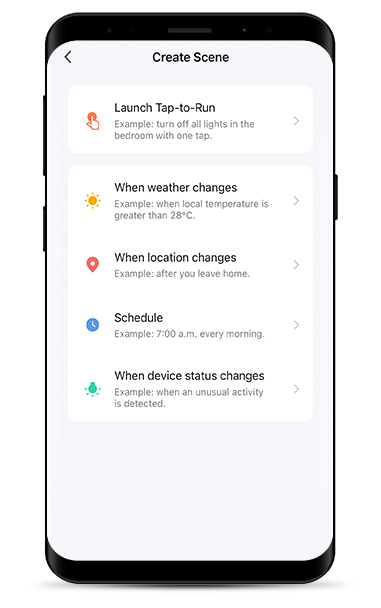
In the next step, you can select which type of scene you want to create. To create a scene for switching on or off, select the top scene type ("Launch Tap-to-Run").
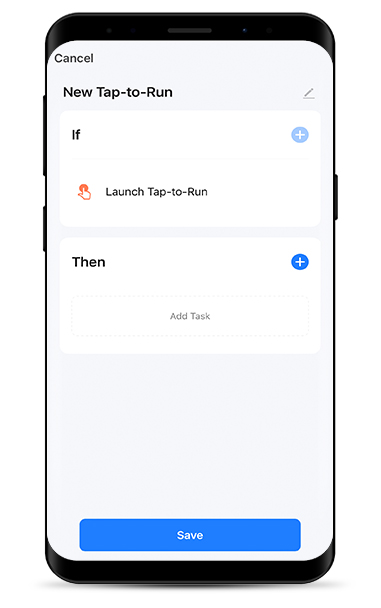
To configure the scene, select a suitable name in the first step (this is required for Siri control), e.g. "Office lamp on". Enter the name by clicking on the pencil at the top right.
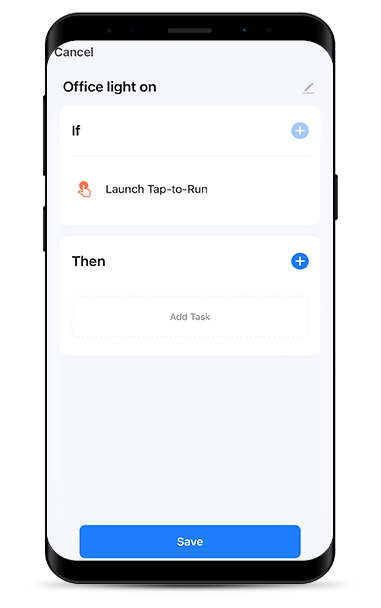
Click on the plus next to the "Then" to select a scene.
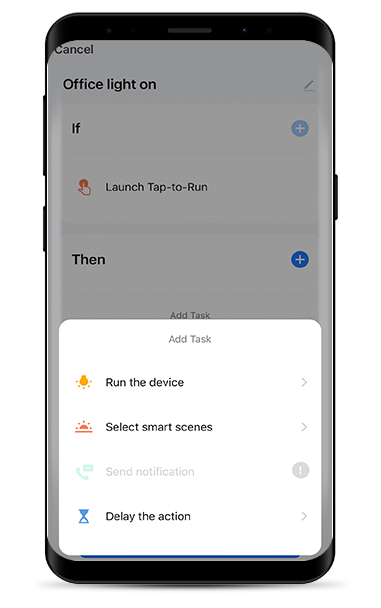
Click on "Run the device" to select a light.
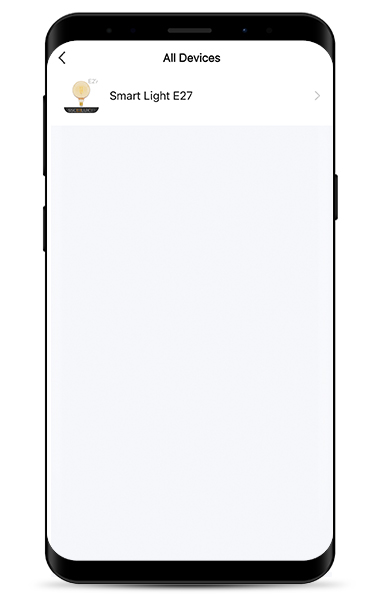
Select the light(s) you want to control with Siri.
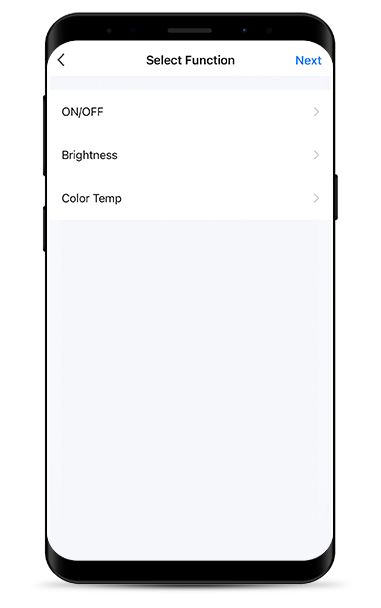
In the next step, you can select which function you want to set up as a scene. Click on "ON/OFF" to configure a scene for switching on or off.
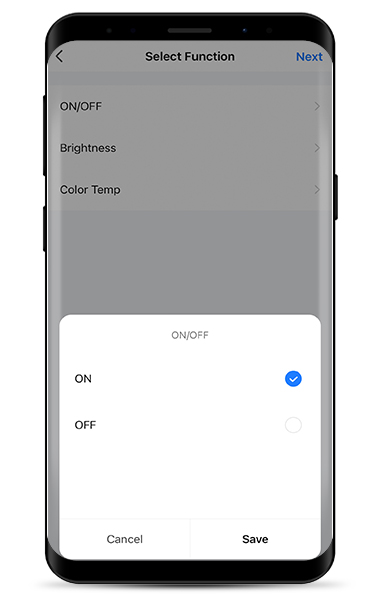
Select the desired function and click on "Save".
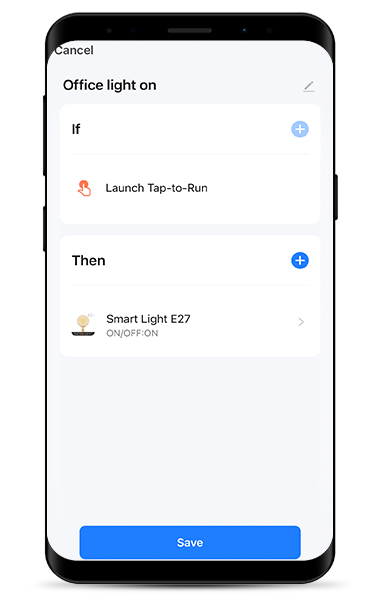
Click on "Save" in the last step.
4.2 Add a scene to Siri
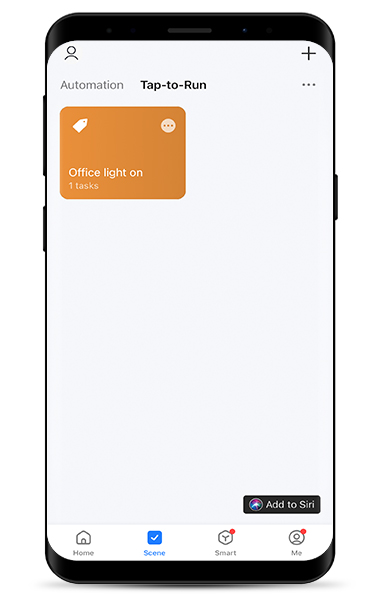
In the scene menu you will find all the scenes you have created ("Tap-to-Run" Tab). Click on "Add to Siri" at the bottom left.
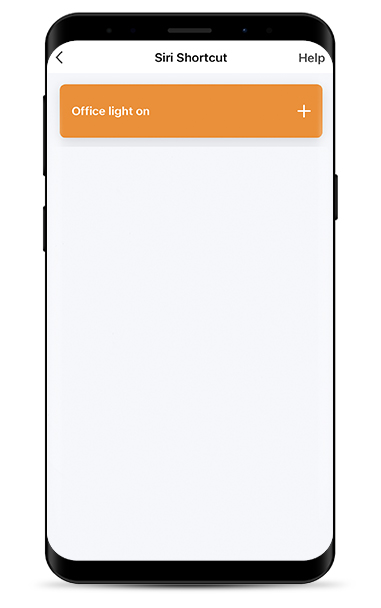
Select the desired scene by clicking on the plus sign.
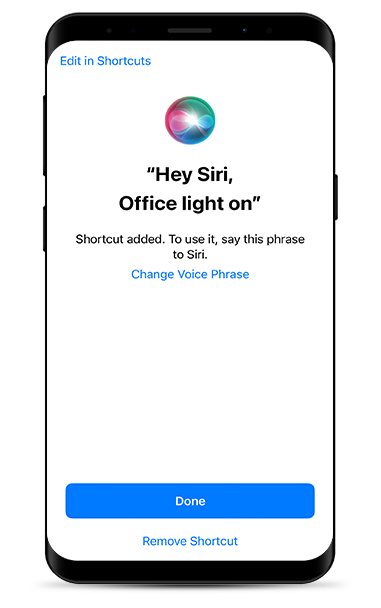
Click on "Done" to add the shortcut.
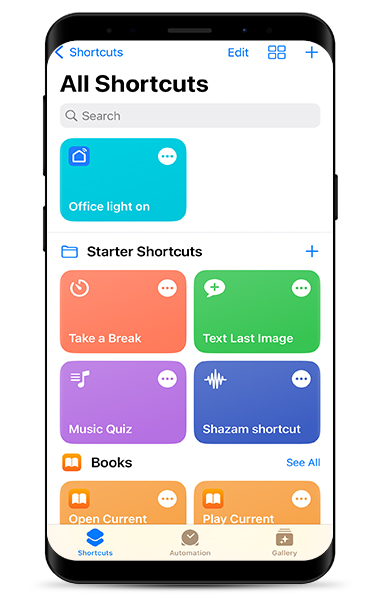
In the Apple app "Shortcuts" you will now find the scene you added. You can switch on the lamp with the voice command "Hey Siri, office light on".


Service-Center
Sie benötigen Hilfe? Fragen Sie uns:
Lichtbringer
Andreas
Wir sind für Sie da:
Mo.–Fr. 09:00–16:00 Uhr
Versandkosten


Versandkostenfrei ab 29 € Bestellwert
Unterhalb von 29 € Bestellwert berechnen wir pauschal 4,95 €.
Wir liefern mit DHL
Wir versenden Ihre Bestellung mit dem Versanddienstleister DHL. Eine Zustellung auf Inseln oder an Packstationen ist möglich. Nach dem Versand erhalten Sie Ihre Sendungsnummer per Mail. So wissen Sie immer, wo sich Ihr Paket gerade befindet. Sie erhalten Ihre Sendung klimaneutral mit DHL GoGreen.

Versandkostenfrei ab 150 € Bestellwert

Versandkostenfrei ab 29€ Bestellwert:
Jetzt mehr erfahren